Introduction
Ever seen a perfect photo—your dog’s goofy grin, a child’s drawing, a stunning landscape—and thought, “I wish I could stitch that”? If your first instinct is to search online for a pre-made design, you’re not alone. But what if you could skip the search and the cost? What if you could transform that personal, meaningful image directly into a stitchable file? Learning how to Convert Image to Embroidery Pattern is the ultimate superpower for any modern embroiderer. It moves you from being a consumer of designs to a creator of truly unique, personal art. This process might sound technical, but with today’s software and a bit of know-how, it’s an incredibly accessible and rewarding skill. Let’s dive in and unlock the potential of your photo library.
Why Bother Converting Your Own Images?
Before we get into the “how,” let’s talk about the “why.” Sure, buying designs is easy, but converting your own offers benefits that go far beyond saving a few dollars.
First, it’s the pinnacle of personalization. You are no longer limited to a designer’s catalog. That quirky inside joke, that specific breed of your cat, or your company’s intricate logo can all become your next project. You infuse your hoop with stories and memories that simply can’t be purchased.
Second, it fosters a deeper sense of accomplishment. There’s an immense pride that comes with holding a finished piece and knowing you were involved in every single step—from selecting the original image to guiding the digitization process and finally pulling the last stitch. The final product is 100% yours.
Finally, it gives you complete creative control. You decide which details to emphasize, what colors to use, and how complex or simple the final design should be. You become the artist and the technician, making every creative decision along the way.
The Nuts and Bolts: What is Digitization?
At its core, converting an image for embroidery isn’t a simple “file conversion” like changing a JPG to a PNG. It’s a process called digitization. Think of it as creating a set of instructions for your embroidery machine.
Your machine doesn’t understand pictures; it understands commands: move here, stitch this long line (a “running stitch”), fill this area with a zig-zag pattern (a “satin stitch”), or cover this larger space with a back-and-forth motion (a “fill stitch”). A digitizer’s job is to trace over the original image and manually assign these stitch types, directions, and sequences. The software you use helps you do this, but it still requires a human eye to make intelligent decisions. It’s the bridge between a flat image and a textured, tactile piece of thread art.
Your Step-by-Step Guide to Creating Your First Pattern
Ready to try it yourself? Follow this roadmap to go from photo to pattern with confidence.
Step 1: Choose the Right Image
Success starts with a good foundation. Not every photo makes a good embroidery pattern. Look for images with:
- Clear Contrast and Simple Shapes: Images with a well-defined subject against a simple background work best. Think silhouettes, bold graphic art, or logos.
- Limited Detail: Fine details like individual strands of hair or tiny text often get lost in translation. Simpler is almost always better, especially when you’re starting out.
- High Resolution: A crisp, clear image gives you more data to work with, making your job as a digitizer much easier.
A simple, bold line drawing is the perfect candidate for a first project.
Step 2: Clean Up Your Image
Before you even open your digitizing software, spend some time prepping your image in a basic photo editor. Increase the contrast, convert it to black and white, or remove any distracting background elements. This step simplifies the digitization process dramatically. The cleaner your canvas, the easier it is to “trace” with stitches.
Step 3: Choose Your Digitization Tool
This is where the magic happens. You have several options, ranging from beginner-friendly to professional-grade.
- Auto-Digitizing Software: Some programs offer an “auto-digitize” function. You load your image, click a button, and it generates a stitch file. This is a great way to dip your toes in, but be warned: the results are often basic and can be inefficient, leading to excessive thread breaks or poor coverage. Use it as a starting point, not a final solution.
- Manual Digitizing Software: This is the recommended path for anyone serious about the craft. Programs like Embrilliance, Hatch, or Brother’s PE-Design give you full control. You manually assign stitch types, plot points, and set the sewing order. There’s a learning curve, but the quality of your designs will be infinitely better.
- Online Conversion Services: As a middle ground, you can upload your image to an online service where a human digitizer creates the file for you. It’s cheaper than buying a pre-made design and ensures quality, but you still miss out on the creative control of doing it yourself.
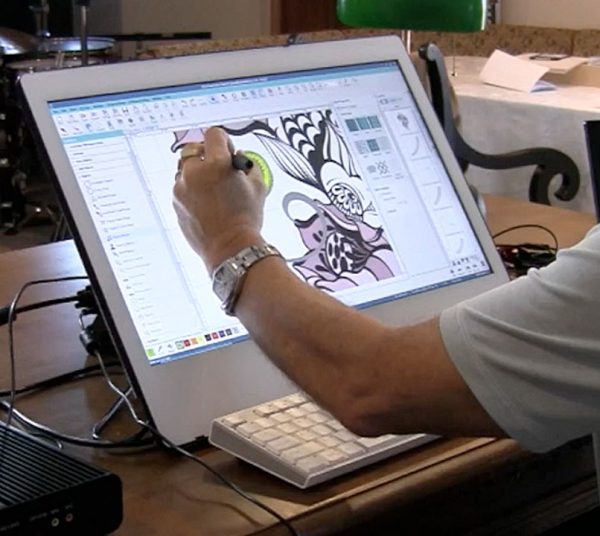
Step 4: The Digitization Process (The Fun Part!)
Once you have your software open and your image imported, the real work begins.
- Trace and Define Areas: Start by outlining the main elements of your design. Use tools to create vector paths around different color sections.
- Assign Stitch Types: This is the crucial decision-making stage. Ask yourself: Is this area a thin line (use a satin stitch)? Is it a large block of color (use a fill stitch)? Choosing the right stitch type defines the texture and durability of your final piece.
- Set Stitch Direction and Density: The direction of your stitches affects how light reflects off the thread, influencing the appearance of your design. Density determines how close together the stitches are—too low, and the fabric will show through; too high, and the design can become stiff and puckered.
- Create a Sewing Sequence: You must tell the machine what to sew first and what to sew last. A good rule is to stitch underlying elements (like a fill) before top details (like an outline). This is called the “stitch order” and is key to a clean, professional look.
Step 5: Test and Stitch!
Never, ever stitch your brand-new design directly onto your final project fabric. Always run a test stitch-out on a scrap piece of the same fabric you plan to use, stabilized the same way. Watch for thread breaks, puckering, or areas where the design doesn’t look right. This is your chance to go back into the software and tweak the file—adjusting density, changing stitch types, or fixing the sequence—until it stitches out perfectly.
Conclusion: Unleash Your Inner Designer
Learning to convert your own images for embroidery is a journey. Your first few attempts might not be perfect, and that’s okay. Every design teaches you something new about how stitches interact, how thread lays on fabric, and how to communicate more effectively with your machine.
The freedom it unlocks is unparalleled. You are no longer waiting for someone else to create the design you envision; you are bringing it to life yourself. So, find that special photo, open your software, and embrace the creative control. Stop buying every design and start building your own unique library of stitched stories. The most meaningful project you’ll ever embroider is likely already sitting in your camera roll, waiting for you to hit “convert.”